Changing the syphon and tank packing in a toilet
This page is about changing the syphon and tank packing in a Lixil (INAX) toilet which has a C-18S seat and DT810-UZ tank. The toilet was leaking even after I changed the float ball, so I thought I should change the syphon to stop the leak. As it turned out that was not the cause of the problem, but the packing between the tank and the syphon was in very bad shape, so it's OK that I changed this.
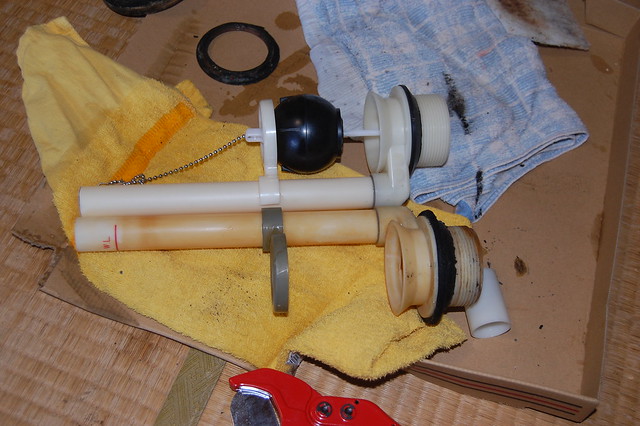
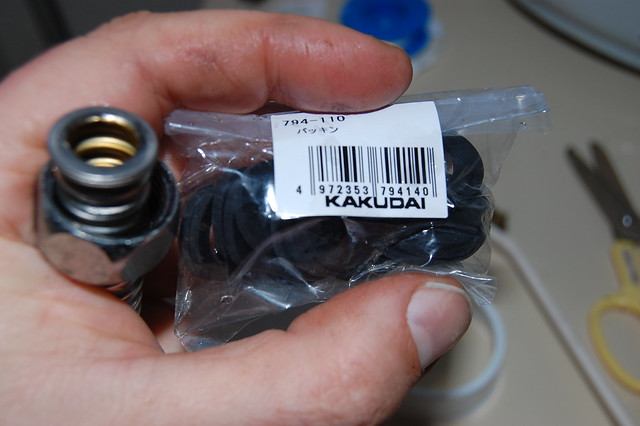
These are the parts I started out with:
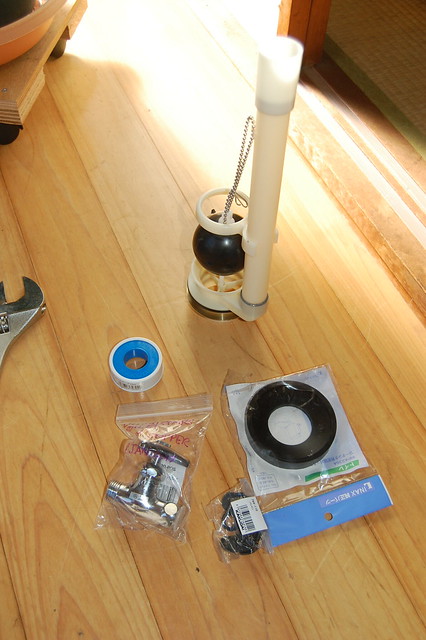
These are the tools:
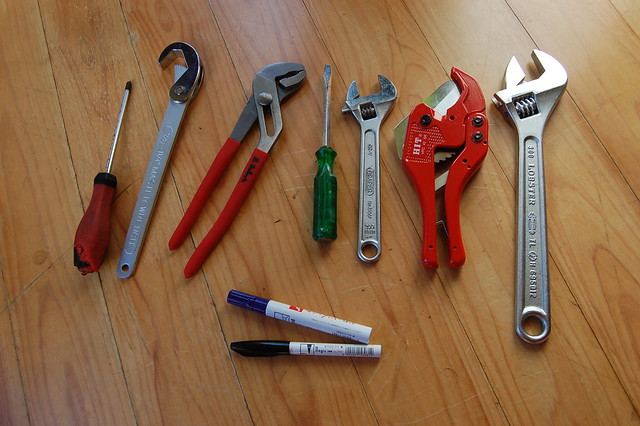
I also had to go out to D2 and buy another tool called a "motor wrench" to remove the nut of the old syphon, which was stuck on very hard.
I bought the syphon from Amazon, and I had previously bought this packing material for the toilet from Amazon too. I had read on Yahoo! Chiebukuro that it was a good idea to change the packing when removing the tank. That turned out to be good advice since the packing was a total wreck.
The old packing
This is the old packing:
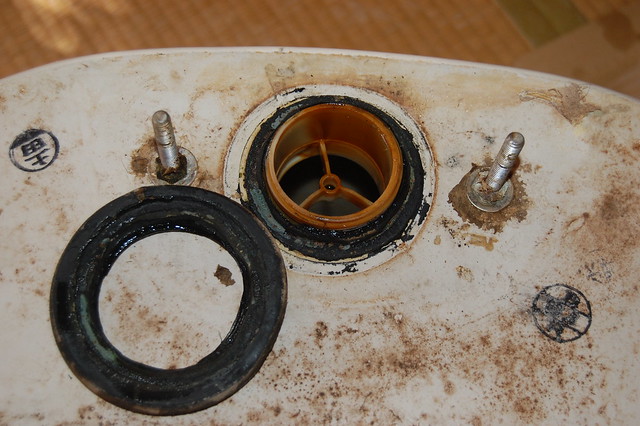
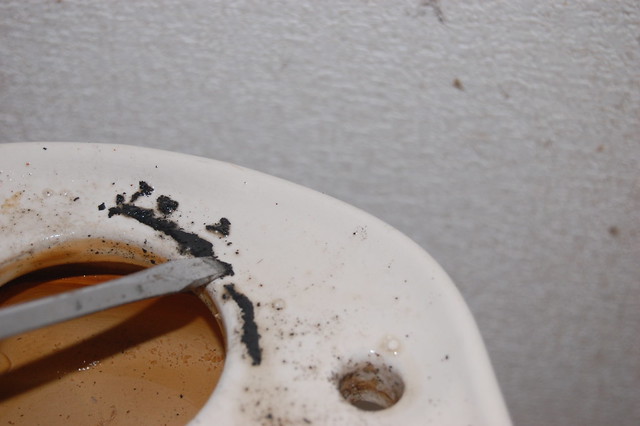
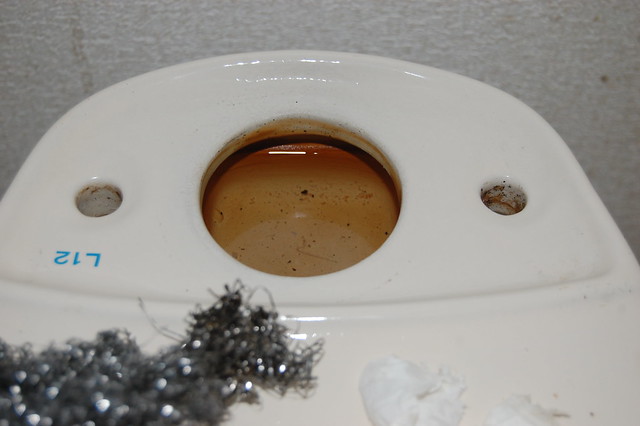
Some of the old packing stuck to the toilet base:

Somehow or another this rubber material was stuck so hard to the porcelain that it needed to be scraped off with a hard metal object:
Here it is finally clean:
Getting the old syphon off
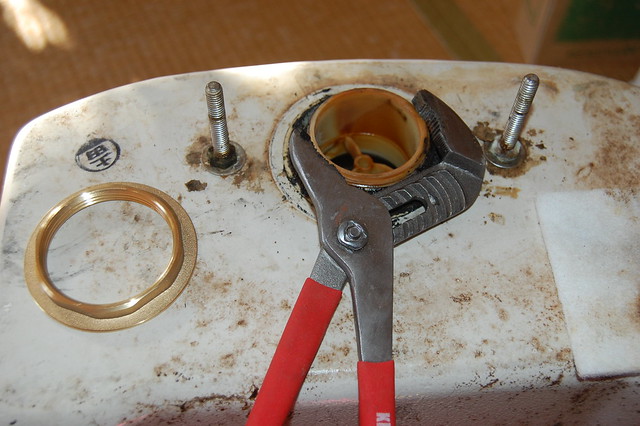
This is the tank, removed from the toilet:

It's fairly dirty, so I took it outside and washed it with a stainless steel wool ball and detergent.
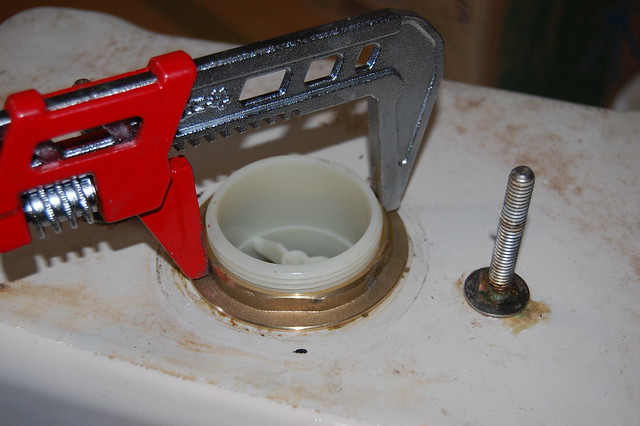
I didn't have any tools which could get this nut off the tank. It is 64 mm diameter, and it was too stiff and slightly too big for these "water pump pliers":
It was on there incredibly tightly. I went to the home centre D2 and bought this, which is called a "motor wrench". In this photo it's shown with the new nut from the new syphon, not the old one.
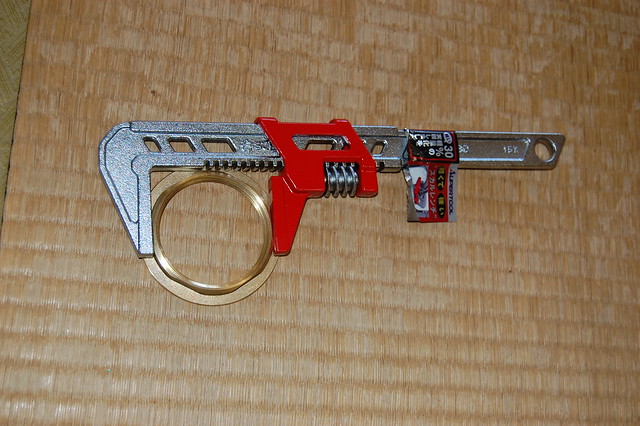
Even with this tool, it was extremely hard to get the nut off, due to the packing being stuck to it.
Fitting the new syphon
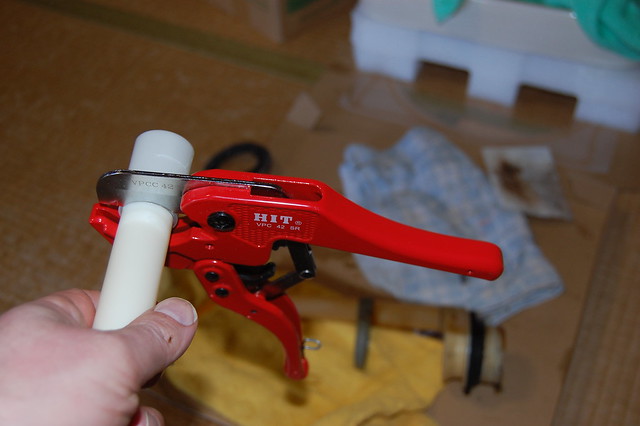
The end of the syphon is too long for this toilet:
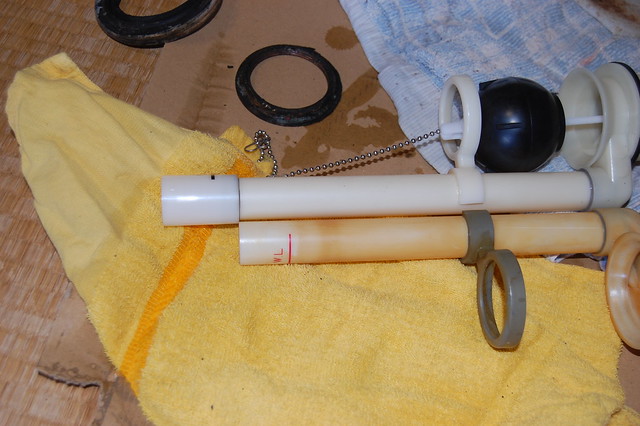
I used a PVC pipe cutter to cut it:
After cutting:
I used the "motor wrench" again to put the nut on:
Here is the new syphon installed in the tank:
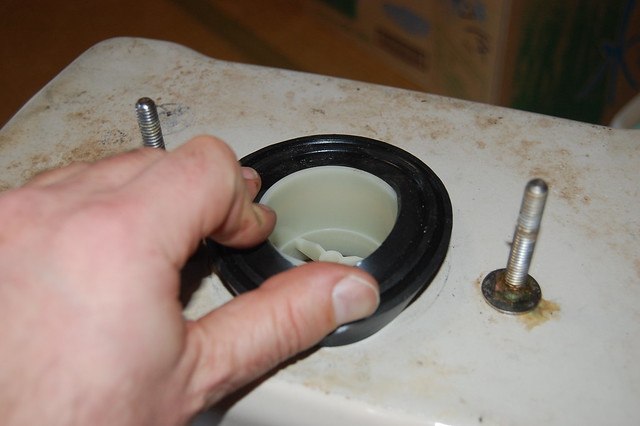
Now I have to attach the new packing on to the syphon on the base of the tank. The hole in the new packing is actually smaller than the syphon:
However, it's not a mistake, this is the right part, it just needs to be stretched over the syphon pipe:
Reattaching the toilet
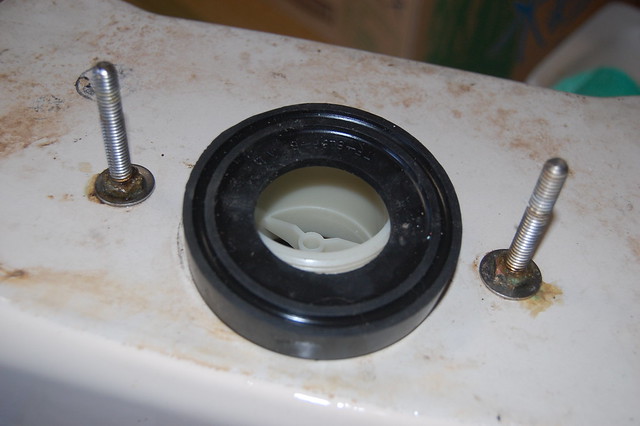
These are the nuts and washers which attach the tank to the toilet base.

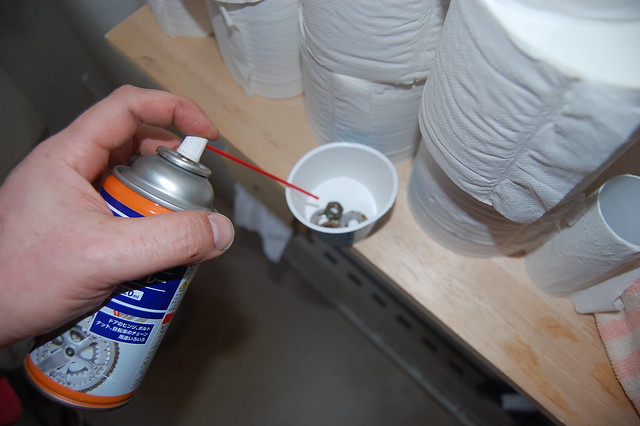
Because the nuts were very difficult to get off, I put some of this D2 lubricating spray on them before replacing them. Next time I do this, I'll buy a ratcheting 13 mm spanner as well, because the nuts had to be twisted by spanner all the way down the whole length of the screw, due to corrosion or dirt.
Here I have reattached the tank, taking care to tighten both sides, and I'm testing for leaks by adding a small amount of water from a bucket:
There weren't any major leaks, but there was a minor one, which I only found after reconnecting the water supply.
Reconnecting the water supply
Next the water supply needs to be reconnected. All of the rubber packings in the pipes need to be replaced, so I got this bumper bag of rubber seals.
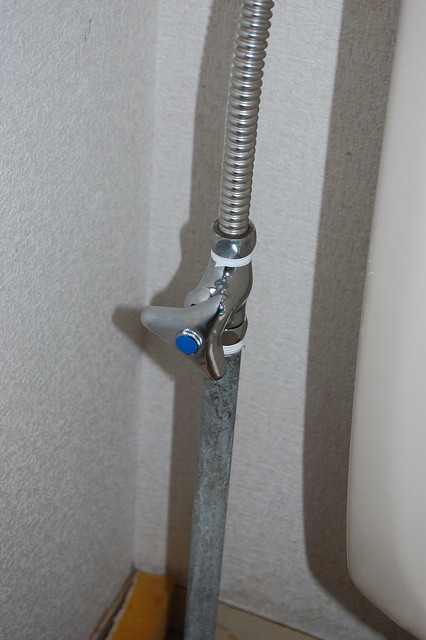
This is the disconnected connection between the toilet tank and the water supply pipe:
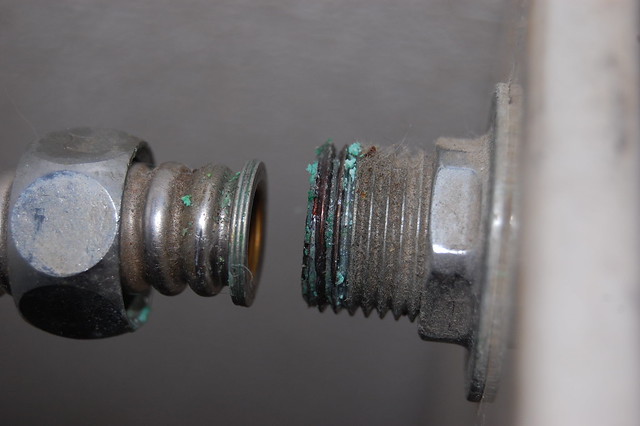
The original packing looked like this:
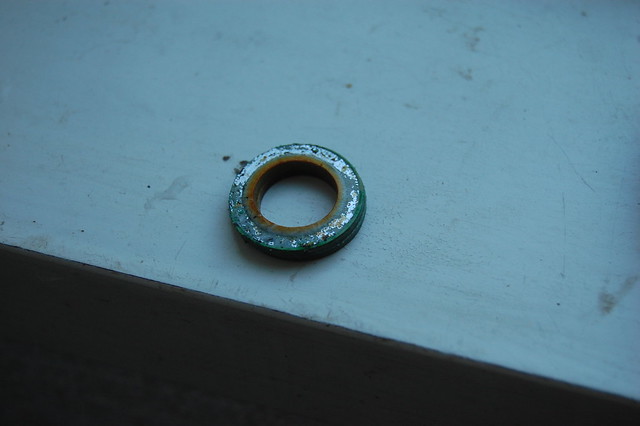
It is metal on one side and some kind of board material on the other.
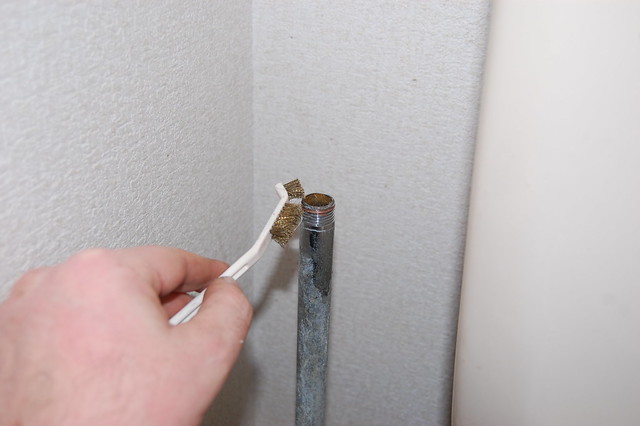
This brass brush (I got it from Daiso or Seria) is good for removing old plumbing tape and other stuff from the end of the pipe without damaging the pipe.
I added a new valve. This is a Kakudai 7830-POS kata natto barubu (片ナットバルブ) from "Homac", which cost 1600 yen plus tax = yen.
The final result, a leak, and another problem
This shows the toilet fully back in place:
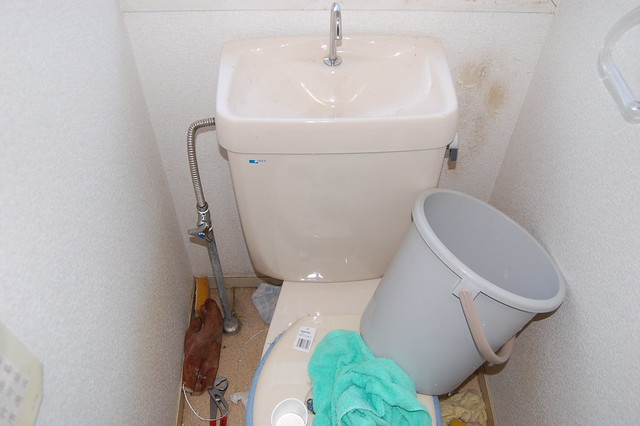
I hadn't sufficiently tightened the two bolts holding the tank to the base, so there was a small leak. The leaks show up on the space between the toilet seat and the tank. The nuts seem to need to be tightened on fairly hard to stop it leaking.
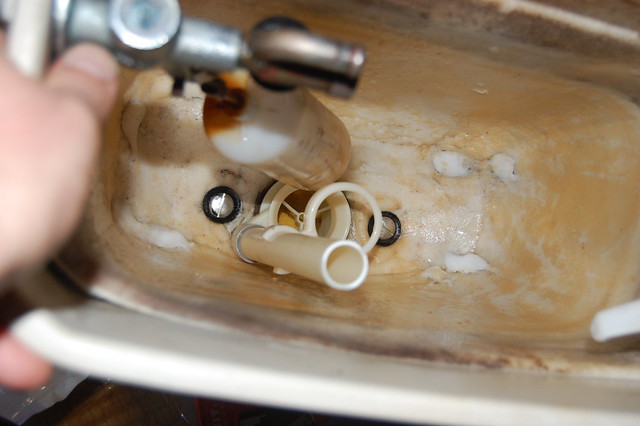
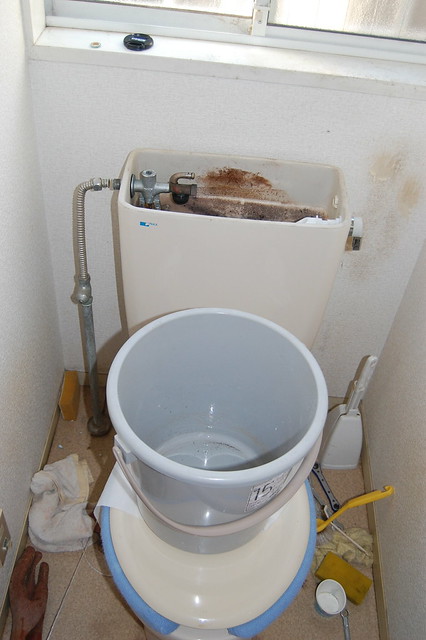
Unfortunately, after all that work, I discovered that the source of the leak from the tank into the bowl wasn't the syphon but the float, which was going too far up and allowing water to drain out of the overflow pipe. The adjustment for the float is the screw in the centre of this photo:
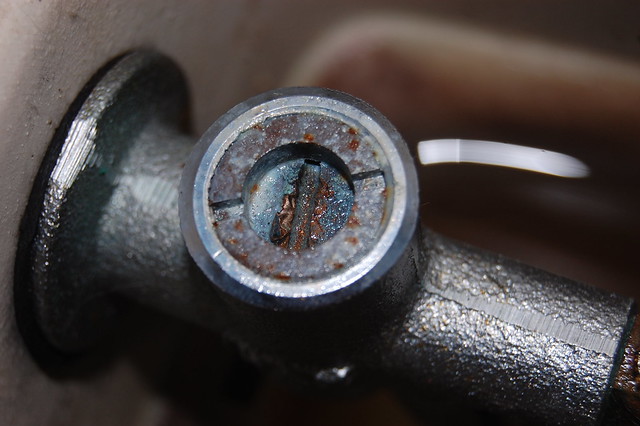
Due to age or corrosion, it's impossible to turn, and I actually damaged the metal trying, as you can see in the photo. This toilet is about thirty years old, so presumably it has corroded solid. Because the float works, but only at higher than the design height, for the time being, I attached the cut-off bit of pipe to the overflow with electrical tape:
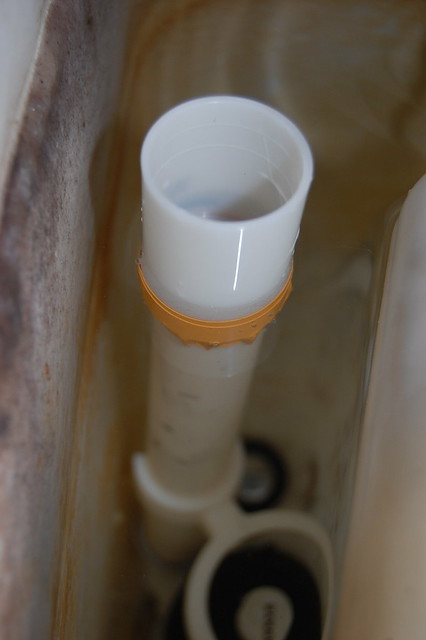
This has stopped the leak, but I've really had enough of trying to fix this, so I just ordered a completely new float, Lixil TF-20B, from a web shop. It cost 2755 yen plus postage. The same thing is on sale at home centres for about 9000 yen, so I saved some money. I'll make another web page about fitting that.